Showing posts with label Mixed projects. Show all posts

Sunday, February 12, 2017

Simple Roses

Tutorial for today on 'SugarCharmShop Gourmet' is for some simple roses in celebration of valentine's day coming up Tuesday :)


I am planning on making more flowers as they look great in the background of photos. Some of them might be listed on Etsy at some point, but I'm mostly making them to keep for the photos - just like the green plant you've seen in quite a few of my videos already. And for those of you who are only interested in the food tutorials on the new channel; don't worry, the majority of the non-food videos, including this one, are uploaded as bonus videos - so you're not missing out of any food tutorials :)

I bought chocolate to use in the photo,.. so you'll have to excuse me while I take on the 'super difficult task' of eating it ;)

Saturday, January 21, 2017

Kitten, Gourmet & Etsy

Yesterday's tutorial on my main channel was for this adorable, little ginger kitten. I was trying to avoid making anything animal themed when I realized how many of my recent tutorials have been including animals - not that I mind, but I'm sure a lot of people wish to see other things as well :)
The reason why I decided to make one anyway is because I want to post the video for different cat accessories next week, and it makes more sense if I actually have a cat to pose with those things, right?


I also listed a few more things on Etsy, and I do want to make a quick note to any danish readers;
Because I'm listing things on Etsy again, I might not be going to any more miniature fairs. I can't say for sure if I'll be doing the october fair this year, as the final one - depends if I'll have enough to fill up my stall. I was hoping on being able to maybe fill up a good portion of a stall with ceramics, but I'm not sure yet.
I will also be posting a tutorial on SugarCharmShop Gourmet either today or tomorrow - I was going to make a project using the cucumber cane from my last video, but I realized I need to make another video to go with that project, before I can post it.. So I'll be postponing that video for a couple of weeks. I just don't want to clutter each video with a bunch of items that'll then make it more difficult for my viewers to find the different 'components' at a later time, so I'm doing my best to keep most things seperate - though I will be combining items like the heart shaped bundt cakes and cooling racks, for some videos :)

Friday, December 4, 2015

miniature toys


I've had a few people requesting my to make some tutorials for different types of toys, so of course I thought it'd be fun to make them in miniature, haha :) The 'littlest pet shop' characters are 5-6mm tall while the 'my little pony' figures are 7mm tall.
Although I prefer making vintage inspired pieces and rarely enjoy making the more modern pieces, the child in me does love making these toys, and I have plans making more! :)


Friday, October 30, 2015

Foxes & pug

I have had quite a long break from making any miniature animals, but luckily I've been in such an 'animal-making-mood' lately :) I say lucky, because I really need to get some animals ready for the miniature fair in 2016! - I've set a goal of bringing at least 20 four legged animals - so cats, dogs, and well, foxes and similar creatures... we'll see ^^'

The fox tutorial was uploaded Earlier this week and the pug will be uploaded today :)


Wednesday, October 21, 2015

Hopefully none of these have been included in a blog update - but I'm sorry if they have; some of my recent pieces :) The blackberries and the cake with the pansies are normal 'realistic miniatures', the rest are slightly more simple and are some of the things I've been making just for the sake of tutorials on my YouTube lately :)
My inner child is loving making these cartoon inspired dolls haha ^^ lots more to come!


Wednesday, September 16, 2015

Ceramics, cockatoo, food & more

Lately I haven't been taking pictures every time I've fired a batch of ceramics - not that I've fired thaaat many times, but I haven't been taking the 'bundled up' pictures I did after the first 4 firings or so. Probably because plates don't change too much, haha.
However, I have improved since the last pictures were taken so I decided to take pictures of some of my more recent ceramics :)
I definitely need to do some more of the handpainted ones (they were decorated using the amaco semi moist underglazes). And I can't wait to use some of those cake stands!
Most of the colors I'm using at the moment (for the base) are the amaco velvet underglazes - love them. They come in a great variety of colors and shades, and you can get them in convenient little 2oz containers which is perfect for those who are making miniatures or only need a small amount of one color :)


I also decided to make a cockatoo (tutorial is being uploaded as I'm typing). Lots of fun and I'm already working on the next 'feathered fellow'.


And because I've been gone from the blog for a while... again... here are a couple of the other minis I've made;


Saturday, May 23, 2015

Lychee & more ceramics

Feels like I haven't made that much the past few days, though I've made something every day.. - I made these miniature lychee (lychees?) which I think came out cute :) I feel like I need to record something to go with them before uploading the tutorial though.


Also fired some more ceramics, which I'm just as excited about as last time haha - The suspense when opening the kiln door after the final firing... love it! - now I just need to make some food for each one.


Now sure whether or not the colors are true to real life - I fixed it in photoshop,. but as soon as I post the pictures on blogspot it seems like the colors are more saturated? Not just in this picture, it's a general problem I've noticed. Might just be me or my browser/computer/whatever.. 

Sunday, May 17, 2015

Ceramics, English Breakfast & Roast

I can't even begin to describe how excited I am, being able to make my own ceramics. They may not be perfect, but hey, I'm a newbie - so it's okay. I used the underglazes I ordered to color some of these. Love how easy it was to make the dishes look rustic by only applying a thin coat.
My main problem now is, that I really want the other palettes as well,. And some more 'normal glazes'. I'd like a crackle glaze and maybe even a metallic one... Will try my best to wait a little while though.

Used a couple of them already;

English breakfast (not enough room for mushrooms).

And I put the second roast in a cooking dish/tray :)

Monday, April 27, 2015

Miniature pasta machine & Elderly lady

Back from the fair! - It was a lot of fun, and it went well.
I'm so happy that people liked all the new items I brought with me this year because that really is very motivating when it comes to making new pieces.
All the animals found a new home and I did sell a few of the pieces of furniture as well :)

Before leaving for the fair I did some research and found measurements for a few of the animals I'd like to make in the future (farm related) hihi - For some reason I really want to make a cow,.. and some goats,. and some other animals lol - I think it'd look cute, though I'm not sure if anyone actually is in need of something like that...

Anyway - I'm excited to be back home and have spent a portion of the day in my craft room, making this little miniature pasta machine for today's tutorial. It's not functional (except from the handle which turns) but it'll look cute on a miniature scene or in a dollhouse! :)


And here's a picture of the elderly lady I made a while ago - finally got around to taking a picture of her :)


Wednesday, April 22, 2015

Rough collie & sleepy kitty

With only a couple of days left before I have to leave for the fair, I've had to realize that I far from has the time to make all the things I wanted.. Still haven't lost hope in being able to make a few more pieces, but it won't be anything major.
I did manage to make 2 furry friends - a rough collie, which I've been wanting to make for a long time. And a sleepy cat :)


Love the glimpse the animals get in their eyes, when the light hits it just right. And though I wish I'd added even more fluffy-ness to the body of the collie, I'm really happy with the result. Back when I made the german shepherd I didn't have the right color of fibres for the fur, so I settled for what seemed to be the closest to the right shade - which was too dark. I didn't have the right shade of 'sabel'/brown for the collie either, but instead of risking getting angry with myself for using the wrong shade, I decided to simply use an off white/creamy color for the body and head, and shade the entire thing with my soft pastels. Yes, the collie is in fact only white and cream haha.
When done thoroughly it won't come off, and the fibres will pretty much be permanently stained - I also sealed it with a fixative for extra protection.


The cat was one of my 'couch crafting' projects - made yesterday. When sculpting dolls and animals I far prefer sitting in the couch as opposed to sitting at my desk. I don't know why, as sitting hunched over in the couch is far more uncomfortable, but when working on more time consuming projects I enjoy being able to watch TV or be in the company of my boyfriend so there's someone to interact with.
Started working on another cat today - did get a late start and won't have as much time tomorrow, but am hoping I'll be able to finish it before leaving Friday.

Saturday, March 21, 2015

Banana bread, Romantic chair & pots/pans

A couple of my recent creations - The banana bread and the pots/pans has already been uploaded as tutorials on my YouTube channel :) Tutorial for the chair will be up at some point - though I'm not sure when.


5 weeks left before I'll be leaving for the Farum fair. I'm excited to see what people think of my new items. This is the first time I'll be bringing some proper animals (have previously only had 1 dog and a bunny to sell...), I'll for once have an OK selection of dolls, I'm bringing mixed kitchen appliances + other mixed minis AND, not to forget - furniture.
Crossing my fingers it'll go well.


Saturday, December 13, 2014

A butcher & a teddy


I made a miniature butcher :) I love making butcher themed "food" in mini, so I thought that at the next fair, the butcher himself should be on my stall!


He reminds me of my granddad (who passed away in 2010), which isn't a bad thing. I guess this is just the type of face I consider to be a typical older looking man.

Had to paint the blue stripes on the apron - or almost paint them.. The fabric had blue and white stripes, but the blue stripes weren't wide enough, so I had to paint inbetween them to get the look I needed.


I also made a teddy bear :) This is for a tutorial for today. I was supposed to post it on YouTube yesterday, but I've got a cold (and so many other things got in the way) so I didn't have time to finish it and edit the video.


Thursday, December 11, 2014

Pottery?

Miniature pottery? haha, yeah..
I've been wanting to try my hands on miniature pottery for over a year.. Actually, I first thought of it back in 2011, shortly after I started making miniatures. I liked the idea of being able to make any size or shape of plate/bowl you needed or any tray, pot, vase, jug etc. But back then (since I'd just started out) something like ceramics seemed frightening, and no way would I've been able to afford the tools and materials - I mean, a kiln?!
After I started using metal clay this year, and learned that a kiln doesn't have to take up an entire room, that urge to try my hands on it came back..
After a lot of research to find out what exactly I needed, I decided to make an order for a pottery wheel a couple of days ago - as well as some clay and glaze. I won't be buying a kiln until January or February, but I thought I could practice... I've never, ever made any type of ceramics before and have never worked with a pottery wheel, so practice will be needed, haha.
It arrived today and I've had a quick play with it.
These were my first attempts (still need to trim the bottoms);


What can I conclude so far?;
1, It's a disadvantage to have long nails! - but I'll just have to see that as a challenge.. in my mind it's not an option to cut them.
2, probably should've waited for my tools to arrive in the mail (basic trimming and pottery tools from ebay) but I didn't feel like waiting up to 2 more weeks before I could have a play with this.. So I just used a wooden stick, a makeup sponge, xacto knife and a blade (for removing the dishes from the wheel).

But you know what? for a first attempt I don't think they're that bad at all!! *proud* lol

The only problem now is, that I reeeeeeally want to fire it..

Will have another play with the wheel tomorrow, after recording the next polymer clay tutorial for my YouTube channel... or maybe I'll just wait till Saturday.. as if =)


Saturday, November 22, 2014

Mini Hedgehogs

Not quite a cat,.. haha.
I am planning on making a cat next - but I just didn't feel like making an eyeball cane today, so instead I made these;
Miniature hedgehogs.


Aaaaand - because I'm close to 200.000 subscribers on my YouTube *yay*, I'll be uploading these as a bonus tutorial today :)

Old picture of me.. Probably 10 years or more since it was taken ;)
My mom has always loved hedgehogs, and fed them leftovers from dinner (outside, like you feed birds). She used to bring hedgehogs in to the house and care for them if they were underweight or ill. So I have fond memories of these little critters.

Friday, November 21, 2014

Pumpkin pie & a German Shepherd

Miniature pumpkin pie and German Shepherd - because that goes together.... or not :)


The pumpkin pie was posted as a tutorial on my YouTube Wednesday, and I just finished the German Shepherd today. That dog has good taste, haha - it's (or she is) wearing a sterling silver chain with a sapphire as a charm.


The colors in the picture aren't 100% correct, but it's close enough.
I didn't have the right color of fur/fibre, so I had to use mainly ash blonde together with 2 other blonde/white  shades, and then add extra shading to give it a more golden tone.. Really need to buy some acid dyes in case I end up in a similar situation.
It will be up as a tutorial on youtube,. at some point. The rottweiler will be up today,. The bulldog will be up in 1-2 weeks, and then this will be uploaded a week after or so.

Think I'll make a cat next.. need to take a small break from the dogs :)

Saturday, November 15, 2014

Bulldog, Done!

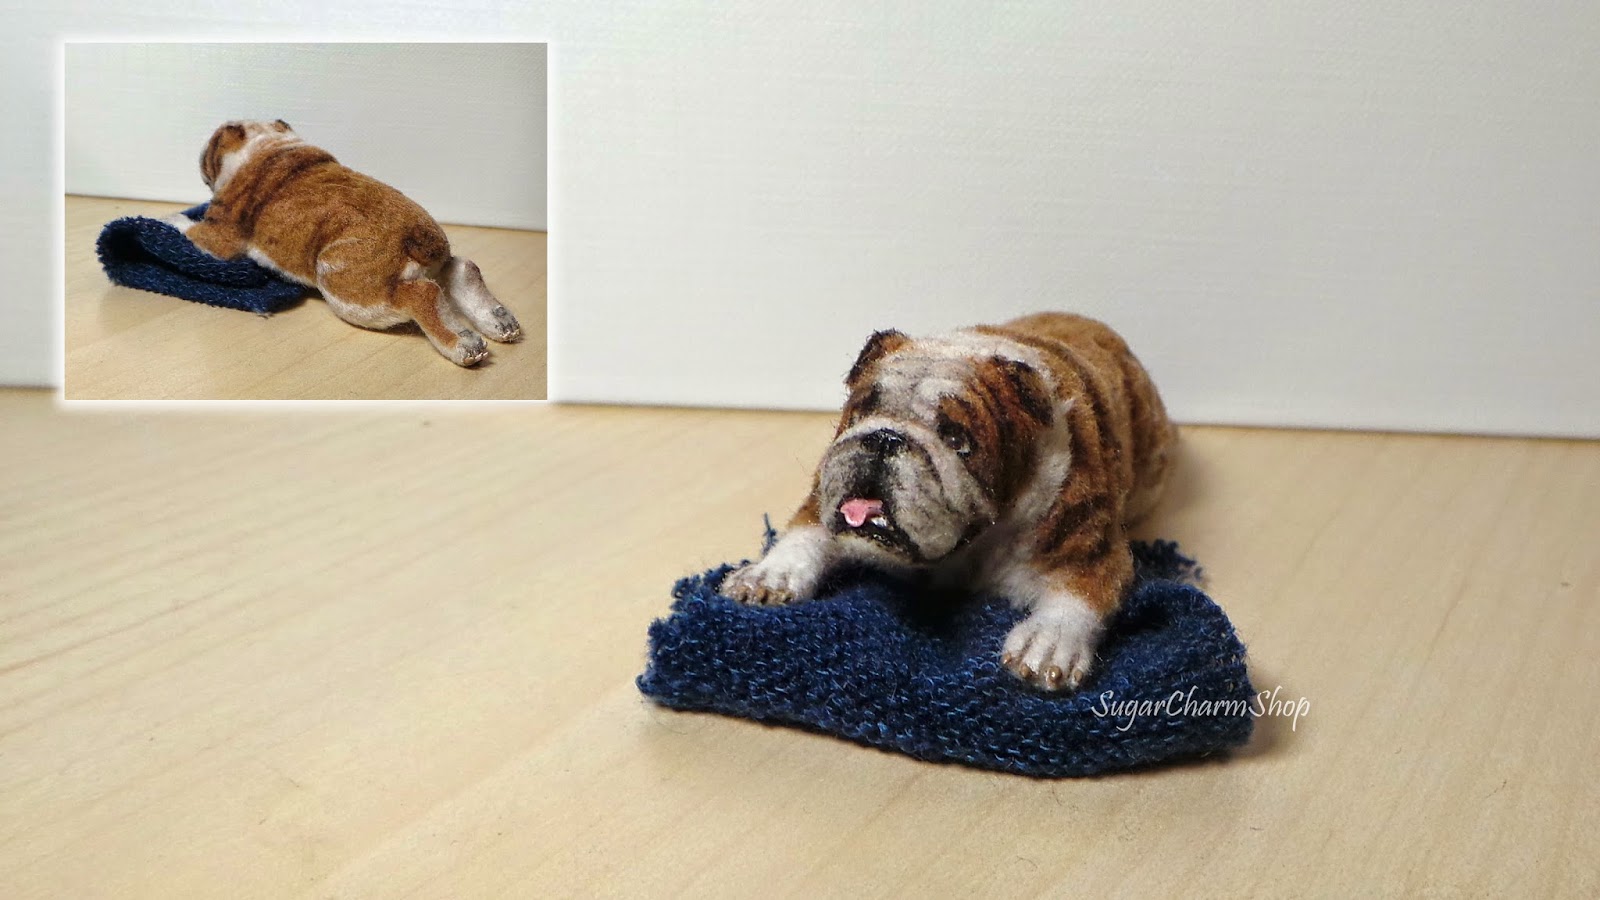
Finished the bulldog - and I think he came out cute! :)


And then I remembered, that I made a bulldog in 2012 as well,... to be fair, I only made 2 dogs in 2012, and the bulldog was the first one... but it sure looks different, haha.


Friday, October 31, 2014

Finished! - Miniature Unicorn/horse

I'm done!! and I am quite happy with the result! :) I ended up cutting the fur/flocking powder manually with scissors, but it actually wasn't that bad. I used angora bunny hair for the fur (because it was the closest I had to white) and it's much more fine/fluffy than the mohair, so it's also a lot faster to cut.
The mane and tail is alpaca hair :)


I didn't photograph it without the horn, but it IS detachable.
Now I just have to go through 100+ video clips and start editing the first part of the video *siiiiigh* haha.
My first thought was to have it in approx 4 parts. But I'll try to cram as much as possible in to one video and see if I can keep it down to maybe 2-3 parts. Would be great if I could fit all the sculpting in to one video... But I don't want it to be too long either.


Wednesday, October 29, 2014

Miniature Horse/Unicorn

This is one of those things, that although measured out to be 1:12th scale, just doesn't seem like a 'miniature' anymore haha.
I'm playing around, having a go at making a horse. Well, I'm actually making a unicorn, but since I don't think a lot of dollhouse collectors need unicorns, I'm going to make the horn detachable - that way I get to make a unicorn, but if someone decides to buy it, they can use it as a horse (or unicorn, if they want).

I'm almost done with the sculpting - just need to make ears, a horn and some corrections/even out a few areas etc.
I'm sure that people who know stuff about horses can find tons of things wrong with it - that's what you get from sculpting partly from images and partly from your own imagination ;) but you know what? As far as I know, there aren't any rules for what a unicorn can and cannot look like! haha. And I don't think you'll even see all the muscles that well once the fur has been added.

I have been recording throughout the process and am hoping on being able to post the first video Friday... otherwise Monday :)

I guess I'll be spending my evening today, in front of the TV, cutting flocking powder for the fur *sigh*

I was thinking of, whether or not some sort of hair trimming device would be able to cut flocking powder faster... might go and ask a hair dresser what they think - I don't want to invest in a hair trimmer that I end up not being able to use...
but for now - I will continue to use scissors.
And yes, I know you can buy flocking powder,. but I want to be able to not only pick the color, but also the material. The look you get from eg. yarn or ribbon is different from the look you get from something like mohair.


I'm using the new doll clay from Fimo; "Fimo professional doll art". The color I'm using is 'sand' which really doesn't matter for this project because I'll be painting over it, but I really like the formular. It's nice and pliable, it comes in a resealable bag - which is always great so you don't need to worry about dust, and it doesn't really change color that much after baking.
It does say that you should bake it at a MAXIMUM of 30 minutes.... I'm a rebel! So I made a small test piece and baked it for 50 minutes *evil laughter*.. Honestly, I don't know why you shouldn't bake it for more than 30 minutes because the result I got was the same as with most brands of polymer clay; Baking it for longer makes it stronger. My test pieces, which was a 8mm thick snake, was really strong after baking, and I could bend it without it breaking - it just bent back into shape. Of course you shouldn't purposly apply stress to the clay after baking, but still.